


Ingredients
-
meringue
-
200 г Egg white6 eggs M
-
320 g Sugar white
-
1 tbsp Corn starch
-
1 tsp White wine vinegar 5%
-
cream and decorations:
-
300 ml Coconut cream
-
1 tbsp Caster sugar
-
to taste Berriesor seasonal fruit
Directions

A few words about Pavlova and its history.
This dessert is so famous that it had become a household name. By saying Pavlova (with the stress on the second syllable, by the way), we all mean an airy and soft meringue dessert with whipped cream.
The cake originates in Australia and is named after the Russian ballerina Anna Pavlova (1881-1931), one of the greatest ballerinas of the 20th century. Her solo dance The Dying Swan became the symbol of the New Russian Ballet. In the 1920s Pavlova toured Australia and New Zealand. It is believed that the ballerina’s lightness, fineness and tenderness inspired the chefs to create this dessert.
As a rule, famous desserts always have a few origin stories. Australia and New Zealand has had a long-term argument over who invented the pavlova. There’s also a version that the dessert originated in the United States and was based on the historical Austrian dessert Spanische Windtorte composed of meringue and whipped cream that was popular during the period of the Austro-Hungarian empire.
Anyway, the pavlova is a traditional dessert of both Australian and Kiwi cuisines and a favorite in the United States and Europe.
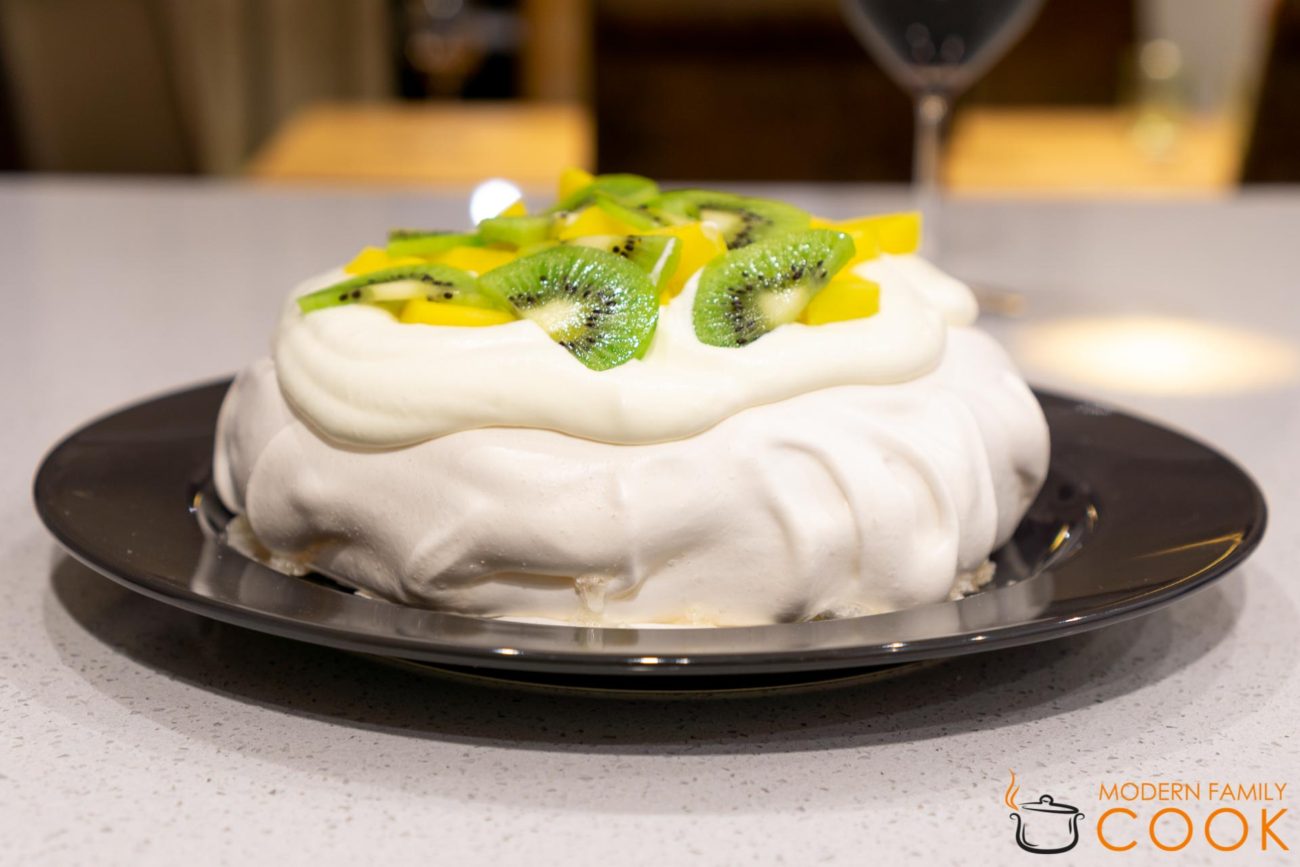
Despite its fragile shape, it’s pretty easy to make. You just should follow a few rules that I’ll draw your attention to in the recipe. The proper meringue for the pavlova is cream colored and cracky with a crispy and crunchy outer shell that will melt in your mouth. On the inside, it has a soft and marshmallow texture.
The pavlova is usually decorated with a topping of whipped cream and fresh fruit or berries, and dusted with confectioner’s sugar.
The pavlova should be prepared in advance, better a day before serving, as after cooking is complete, it should be left in the closed oven for at least 6-8 hours. So it’s better to make in evening and leave the cake in the oven overnight. Meringue can be prepared 3 days ahead and keep at room temperature uncovered.
It’s so incredibly light and delicious. Pure delight!
Today's visits: 1.
Steps
|
1
Done
|
temperaturePreheat the oven to 100 degrees and turn the fan on to help meringue dry. If your oven doesn’t have a fan, preheat it to 100 degrees too, but increase the baking time. Pavlova bakes at low temperatures that allows it to stay snow-white. Higher temperature will tint the meringue slightly golden-yellow, which looks stunning too. |
|
2
Done
|
You can draw an 20 cm circle on baking paper, position the paper on the baking sheet drawn side down, and spoon the meringue into the circle. Or just trust your eyes and don’t draw a circle. Personally, I don’t, but it’s all up to you. |
|
3
Done
|
meringueBeat the egg whites on low speed, then on high until soft peaks. Then gradually add sugar, one spoon at a time, while continuing to whip until stiff peaks form. Sugar should completely dissolve. |
|
4
Done
|
assembleSpoon the meringue onto the baking sheet lined with baking paper. Form an 20 cm circle, and shape using a spatula to create beautiful peaks on the sides. Or use a fork to make the sides somewhat ribby. Smooth the top out and make a crater so the sides are a little higher than the middle. You have to end up with about 20 cm meringue disk with about 10 cm high sides. |
|
5
Done
|
bakeBake for 1 h 30 m. Don’t open the oven during baking. The meringue will get crisp and white on the inside and soft and creamy on the inside. |
|
6
Done
|
Chill and storeTurn off the oven. Try not to open it until the meringue is completely cooled. It’s better to make it in the evening to leave it cool overnight. By the way, you can prepare it 3 days ahead and decorate with whipped cream, fruit and berries before serving. |
|
7
Done
|
Decorate and serveChill coconut whipping cream overnight in the fridge. Beat the coconut cream until stiff peaks form. Fill the center of the meringue with the whipped coconut cream, and top with berries and/or fruit, dust with confectioner’s sugar. Serve right away and the meringue gets wet because of the cream and gradually settles down. |